TimeCo Employee Web- Punch Instructions
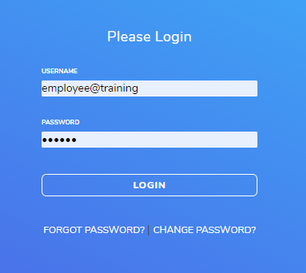
Open the web browser of choice and navigate to this address: https://my.timeco.com
-
Username is: first initial and last name@F1912, for example jsmit@F1912
-
Password is the date of birth in the M/D/YYYY format. For example, February 2nd, 1970 would be 2/2/1970 (do not include leading zeros on single digits).
-
An employee may change their password from this same login page, using the
 link at the bottom.
-
If an employee forgets their password, they may select

Mobile Access:
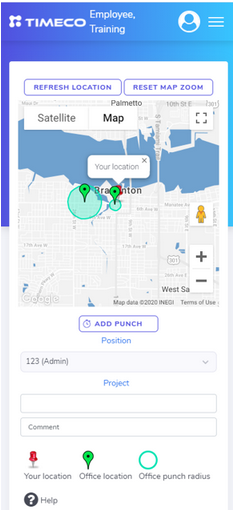
If an employee has been granted mobile access, they may use their mobile device to punch in/out by navigating to the same web address that they would use on a computer: https://my.timeco.com
Please ensure that prior to punching in, that the pin on the map is in the correct place, and if not, tap  at the top left.
If an employee wishes to add a link to the website on their device’s home page, navigate to the browser options (usually at the top right corner) and choose the option Add to Home Screen.
Please note: if you are utilizing the mobile version of Timeco, it is not advisable to use the SSO (single sign on) from an external source, when applicable – you will want to log directly into Timeco here: https://my.timeco.com
To access more options as an employee, tap on the menu at the top right corner:
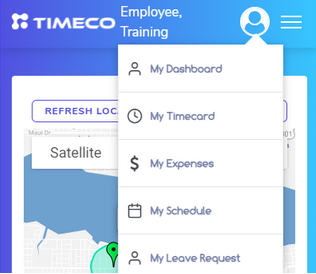
Dashboard
The employee Dashboard will show various metrics for the current week, along with the PTO/Vacation/Sick balance:

My Timecard:
To punch in or out, select the  button and the current time will be added to the timecard.

An employee may also enter some comments in the comments box along with the punch. The employee’s supervisor will see these comments when approving the timecard.
If an employee works in various “Work Segments” throughout the day, they may change the Position or Project fields as seen below.

An employee may review their punch history by clicking the Pay Date Range at the top right of the timecard:
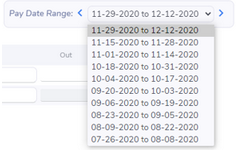
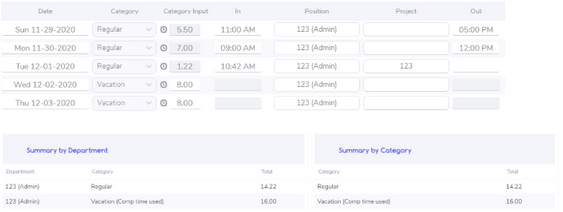
The timecard will display the punches for the current pay period with a grand total at the bottom:
An employee may click Submit and sign the timecard digitally. By submitting the timecard, the employee is agreeing that it is accurate and correct to the best of their knowledge at this date and time.

Additional Employee Options
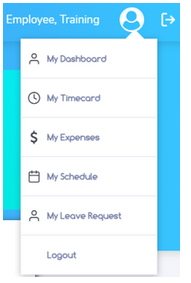
Employees may select the icon at the top right corner to display other options:
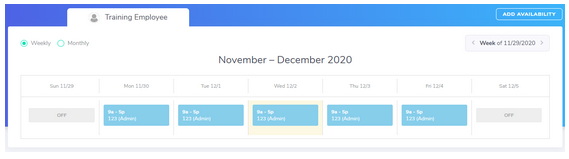
My Schedule:
This area will allow employees to review the hours that they are supposed to be working Daily/Weekly/Monthly. These scheduled hours are entered by the supervisor or system admin.
-
If an employee does not punch in/out as expected, it may trigger an exception that the supervisor can see (Late/Early Arrival/Departure or Absent). The triggering of these rules would depend on the setup of each company.
If an employee works outside of their scheduled time, an exception will be flagged on the timecard. For example a Late Arrival (L):

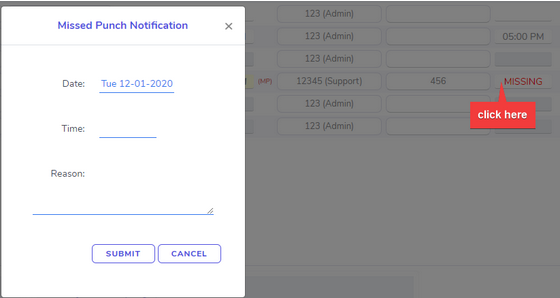
Missing Punch Correction:
If an employee forgets to punch in or out, they may submit a missing punch request to be approved by their supervisor. Note, this is sent to their main supervisor:
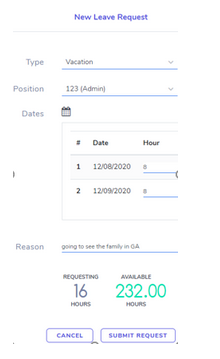
My Leave Request:
This section allows an employee to review and submit time off requests.
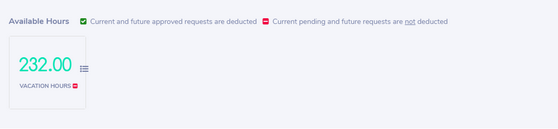
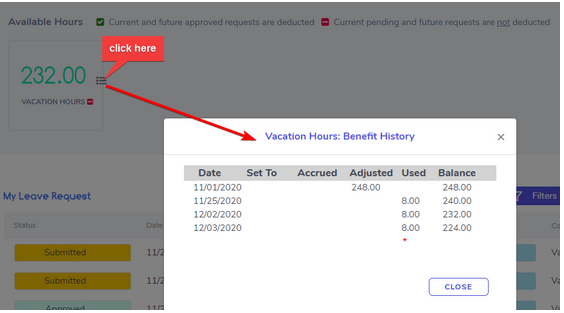
Available Hours – allows an employee to view their current balance (as of this very moment) and click the small calendar icon to review the history associated with this leave request category
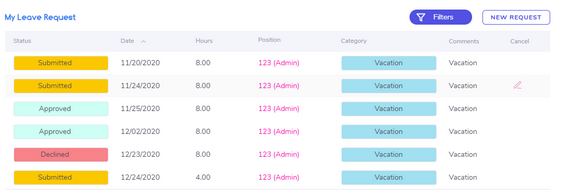
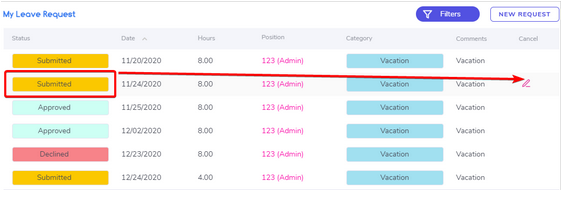
The My Leave Request area allows the employee to review current, future, and previous time-off requests.
An employee may cancel their request if the request remains submitted (unapproved) or even if the request was approved already. To cancel a request, select requested date, and click the Cancel icon(  ) in the right column.
New Request – click the
 button at the top right of the main leave request area to submit a new request.
-
Choose the Leave Request Type for Vacation, PTO, Sick, etc. This depends on the options available to the employee.
-
Select the calendar icon
 then select the days via the calendar popup
 -
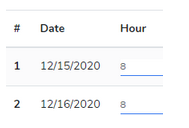
Ensure the proper hours are entered per day in the form:
-
Select
 at the bottom of the form, and the request will be emailed to the supervisor(s) for approval.
-
The employee may track this request from the My Leave Request area, and they will also be notified by email once the request is approved/declined.